
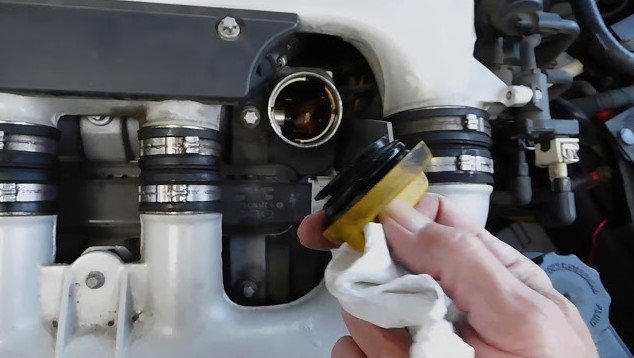
If you find that your engine oil cap is so tight that it refuses to budge, don’t panic. While a stuck cap is often just the result of a dried rubber seal or heat expansion, it can sometimes indicate serious engine pressure issues that require professional attention.
Have you ever popped your hood to check your oil levels, only to find yourself wrestling with a stubborn filler cap that simply refuses to move? It is one of those frustrating car maintenance moments that can make even the most seasoned DIY enthusiast feel like they have lost their grip. You might be wondering, “Why is my engine oil cap so tight?” and if there is something wrong with your vehicle.
In the world of 2026 automotive engineering, cars are designed with precision. Everything under the hood has a specific purpose, including that small cap on top of your valve cover. While it might seem like a simple plastic lid, it plays a vital role in keeping oil inside and dirt out. When it becomes stuck, it is usually a sign of environmental factors, but it could occasionally point to underlying engine health concerns.
Key Takeaways
- Thermal Expansion: Metal and plastic components expand under high heat, which can cause the threads of your oil cap to bind tightly.
- Vacuum Pressure: A malfunctioning Positive Crankcase Ventilation (PCV) system can create a vacuum, making the cap difficult to unscrew.
- Seal Deterioration: Old, cracked rubber gaskets often harden and fuse to the valve cover, creating a sticky, airtight bond.
- Safety First: Never use excessive force or metal tools that could crack plastic components or drop debris into your engine.
- Proper Maintenance: Regularly cleaning the filler neck and replacing worn-out O-rings can prevent future issues with a tight oil cap.
- Listen to the Engine: If the cap is tight and you hear hissing or whistling, consult a mechanic immediately to avoid internal pressure damage.
Understanding Why Your Oil Cap Becomes Difficult to Remove
Most of the time, the reason your engine oil cap is so tight boils down to simple physics. When an engine runs, it reaches very high temperatures. This heat causes the materials of the engine block, the valve cover, and the cap itself to expand. If you try to open the cap while the engine is still blistering hot, you are working against the physical laws of thermal expansion.
The Role of Heat and Pressure
Engine components are made of different materials typically aluminum, steel, and high-temperature plastic or composite for the cap. Each of these materials expands at a slightly different rate when exposed to heat.
This expansion can cause the threads of the cap to mesh more tightly against the filler neck. Once the engine cools down, the materials contract, but they may “set” in that tight position, making it feel locked in place.
Additionally, modern engines operate under specific pressure conditions. If your engine is not venting correctly, internal pressure can build up. While this is less common for an oil filler cap than a radiator cap, it is still a factor to consider. If you notice the cap is always extremely tight, it could be a small symptom of a larger, hidden problem.
Environmental Factors and Road Grime
Think about the environment under your hood. It is exposed to extreme heat cycles, oil vapors, and road debris. Over time, these elements can create a buildup of “gunk” or dried oil residue around the threads of the filler neck.
This residue acts like a mild adhesive. When it dries out, it creates a physical bond between the cap and the engine, effectively gluing it shut. It is not necessarily a mechanical failure, but it definitely makes your oil change process much harder than it needs to be.
The Hidden Culprit: PCV Valve Issues
One of the more technical reasons why your engine oil cap is so tight involves your Positive Crankcase Ventilation (PCV) system. This system is designed to remove gases that escape from the combustion chamber into the crankcase. If this system fails, those gases stay trapped inside the engine.
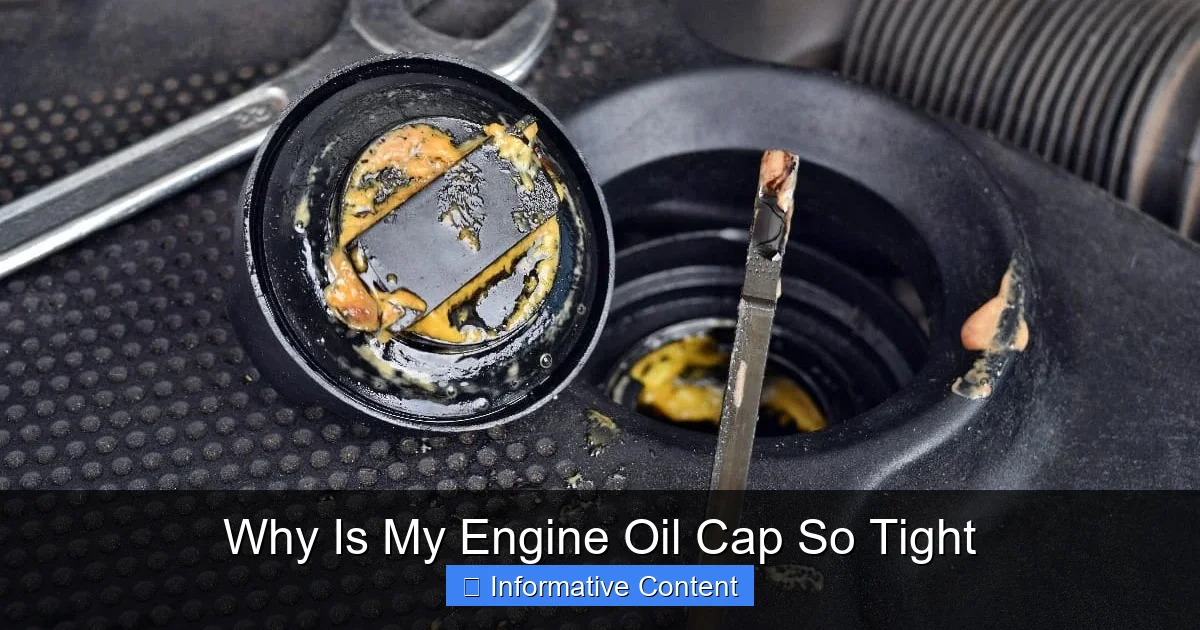
Visual guide about Why Is My Engine Oil Cap So Tight
Image source: vehq.com
What is a PCV Valve?
The PCV valve is a small component that regulates the flow of these gases. If it gets stuck closed or becomes clogged with sludge, the pressure inside your engine has nowhere to go. This can cause various seals in the engine to leak, and it can create a suction effect or a pressure buildup that affects how easy it is to remove components like the oil cap. If you find that the cap is always tight and you also notice oil leaks or poor engine performance, the PCV valve is the first place you should look.
Signs of a Faulty Ventilation System
Beyond a tight cap, there are other symptoms that your ventilation system might be struggling. These include a rough idle, excessive oil consumption, or even a whistling sound coming from the engine bay. If you hear hissing when you finally manage to twist the cap, it confirms that there is significant pressure buildup. Ignoring this can lead to blown oil seals or gaskets, which are far more expensive to repair than a simple PCV valve.
Managing Rubber Seals and Gaskets
Almost every oil cap has an O-ring or a rubber gasket seated on the underside. This is what creates the airtight seal to prevent oil from splashing out while the engine is vibrating at high speeds. Over the years, these rubber components take a beating from engine oil and heat.
Why Rubber Hardens Over Time
Rubber is an organic material that eventually loses its elasticity. As the engine oil breaks down the chemical structure of the rubber, the seal becomes hard and brittle. Instead of providing a nice, squishy grip, it turns into a rigid plastic-like ring. This ring can fuse to the metal neck of your engine filler hole. When this happens, even if the threads are not crossed, the gasket itself will hold the cap in place with a stubborn grip.
Prevention and Maintenance Tips
To avoid this, you can perform simple maintenance on the cap itself. Every time you do an oil change, wipe the seal with a clean rag. If the seal looks cracked, dry, or flattened, replace it. Many auto parts stores sell universal O-rings, or you can buy a new cap for just a few dollars. Replacing the cap assembly periodically is a cheap insurance policy for your engine’s health.
How to Safely Remove a Stuck Oil Cap?
If you are currently standing in your driveway wondering why your engine oil cap is so tight and how to get it off, stay calm. Never use a pair of large channel-lock pliers or a metal wrench if you can avoid it. You are working with plastic components that can shatter or crack, which would drop plastic shards directly into your engine oil—a scenario you definitely want to avoid.
Using Proper Leverage
Start by letting the engine cool down for at least 30 to 60 minutes. Once the engine is cool to the touch, try to grasp the cap firmly with a dry rag to improve your grip. The rag helps prevent your hand from slipping and provides a bit more surface area for torque. If it still won’t budge, try gently tapping the top of the cap with the palm of your hand. Sometimes a light shock is enough to break the bond of dried oil or a stuck gasket.
When to Seek Professional Help
If the cap refuses to move even after it has cooled and you have tried a firm grip, do not force it with metal tools. It is very easy to snap the plastic “wings” off the top of the cap. If you break the grip points, you will have a much harder time getting the cap off. If it is truly seized, take your car to a trusted local mechanic. They have specialized tools that can grip the cap without damaging the valve cover threads, and they can diagnose if the tightness is caused by internal pressure.
The Importance of Proper Cap Tightening
Many drivers contribute to the problem by over-tightening the cap themselves. It is a natural human tendency to want to make sure it is “extra secure,” but engine oil caps do not need to be torqued down like a wheel lug nut. They only need to be turned until they seat firmly against the gasket.
Developing Good Habits
Teach yourself to stop the moment you feel resistance. You want the seal to be tight enough to stop oil mist from escaping, but loose enough that the next person (or your future self) can easily remove it. If you have to use both hands and your full body weight to turn the cap, you are tightening it far too much.
The Role of Cleanliness
Another habit to adopt is cleaning the filler neck area before you remove the cap. Use a clean, lint-free cloth to wipe away any dust or road grit that has collected around the threads. This ensures that no debris falls into the engine and that the threads stay clean, preventing the cap from binding the next time you need to top off your oil. Keeping the area pristine is one of the best ways to ensure you never have to ask why your engine oil cap is so tight again.
Conclusion
Dealing with a stuck oil cap is a common frustration, but it is rarely a sign of a catastrophic engine failure. Usually, it is simply a byproduct of heat, time, and the natural wear of rubber gaskets. By understanding that thermal expansion and dried-out seals are the likely culprits, you can approach the problem with patience rather than panic.
Remember to always prioritize safety by letting the engine cool and avoiding aggressive use of metal tools. If your oil cap feels consistently tight, check your PCV system for potential issues, as this is the most common mechanical reason for abnormal pressure.
With a little bit of care and regular maintenance, you can keep your engine running smoothly and ensure that your oil changes remain a quick and easy part of your routine. Keep your caps clean, don’t over-tighten, and enjoy the peace of mind that comes with a well-maintained vehicle.
Frequently Asked Questions
Is it normal for my oil cap to be difficult to unscrew after a long drive?
Yes, it is common because of thermal expansion. The heat from your engine causes the cap and filler neck to expand, making them fit together much more tightly than when the engine is cold.
Could a stuck oil cap be a sign of a blown head gasket?
While a stuck cap is usually caused by heat or debris, a blown head gasket can cause extreme internal pressure. If you have other symptoms like white smoke from the exhaust or coolant loss, you should have it inspected immediately.
Can I use pliers to remove my oil cap?
It is generally discouraged because the plastic is brittle and can easily crack. If you must use a tool, use a rubber-strap wrench to distribute force evenly without damaging the plastic cap.
How often should I replace my engine oil cap?
There is no set mileage for replacing an oil cap, but you should inspect the rubber gasket every 20,000 miles. If it looks flattened, cracked, or feels hard, it is time for a replacement.
Why does my oil cap make a hissing sound when I open it?
A hissing sound indicates that pressure was trapped inside the crankcase. If this happens frequently, your PCV valve is likely clogged and needs to be replaced to prevent damage to your engine seals.
Should I put oil on the threads of the cap to make it easier to open next time?
No, you do not need to lubricate the threads. Simply keeping the filler neck clean of dirt and old, dried oil residue is enough to keep the cap moving smoothly.